This week's Yanmar tractor tip

Leanne Schmid

HOW TO OPERATE YOUR TRACTOR PROPERLY ON SLOPES & HILLS

IGNORING THESE TIPS COULD SEND YOU DOWN A SLIPPERY SLOPE…

Operating a tractor on hillsides, and climbing and descending hills are some of the most challenging and risky situations a tractor owner can face. But tractors and their attachments are about caring for the land -- the earth -- and the earth is not flat. Sometimes a particular task that must be completed involves maneuvering on sloping ground. But never let the desire to complete the task come before protecting the tractor operator and any co-workers or bystanders.

When you find yourself in a tractor operating situation that includes hills, follow these tips to not only get your job done, but to get you and yours back home without incident.

Proper operation of the tractor and attachments should be your number one priority. Read the owner’s manuals of both the tractor and the attachment for tips specific to your tractor and its performance on slopes and hills. Always wear your seatbelt and ensure your Roll Over Protection System (ROPS) is in the up position while operating any machinery in any circumstance.


  1. Overturns are a major source of tractor accidents. Tractors are subject to both side overturns and rear overturns where the front of the tractor lifts and the tractor falls over backwards. Tractor overturns can occur on flat, level surfaces, not just on sloping ground. Proper operating techniques and being on guard to prevent overturns are required whenever a tractor is being used.
  2. When operating on sloping terrain, be even more cautious to prevent tractor overturns.
  3. Tractors tend to be more stable if properly configured and ballasted. Refer to the operator’s manual and talk to your tractor dealer for details.
  4. On sloping ground, it may be better to run the tractor up and down the slope as much as possible rather than across the slope. This may help minimize the chances of a side overturn. Maximum caution to prevent rear overturns is always necessary.
  5. As much as possible, by hand and on foot in many cases, prepare the sloping ground work area before using the tractor by removing obstacles such as rocks, debris, and fallen and low-hanging limbs (you don’t want to strike a low-hanging limb with your tractor cab or ROPS). Loose debris can make slopes slippery even in dry weather. If trees, boulders, or other fixed obstacles make the sloping ground very challenging for tractor operation, do not hesitate to choose to not use the tractor to accomplish the task.
  6. Run the tractor in a lower gear range to give you more control over the machine while operating on a slope. In addition, set the tractor into four-wheel drive; this provides more traction and a stronger ability to brake. This is because in two-wheel drive, only the rear-wheels brake. Therefore, operating your tractor in a low range and in four-wheel drive while on a slope will help you maintain control of the tractor in a slow and cautious speed appropriate to doing work on sloping ground.
  7. Note how tractor braking differs from how cars and trucks brake (cars and trucks always have braking on all wheels). Remember that tractors are built very differently than cars and trucks and perform differently. Therefore, adjust your driving techniques accordingly.
  8. Always keep the tractor in gear while operating on slopes and hilly terrain. When shifting from forward to reverse (or from range to range), place your foot on the brake to prevent rolling downhill as the transmission shifts. Avoid starting and stopping on slopes. Whenever possible do not make any sudden direction changes, headland turns, or stops on steep slopes. Make your headland turns, stops, and other changes on more level ground at the beginning or ending of the slope if at all possible.
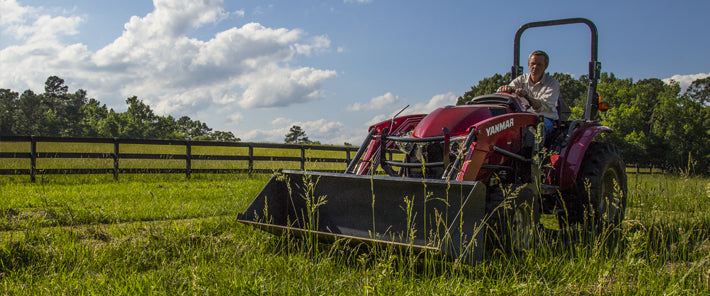
  9. When using a front-end loader on a slope, it’s imperative to keep the loader as low as possible at all times. Raising the loader too high on a slope can significantly increase the chance of a rollover. Remember that low and slow are good watch words for loader operation on any terrain.


Follow these tips and apply a little extra caution, and you can keep your tractor and your day from going downhill.

Read more →

This weeks Yanmar tractor tip: WHO MOWS BEST?

Leanne Schmid

WHO MOWS BEST?

PRODUCT PRO-TIP: MOWER OR CUTTER, WHAT MOWS BEST?

What’s the difference between a 3-point-mounted or pull-type finish mower, a mid-mount mower, or a rotary cutter? How do you know which one is the best for your needs?

A finish mower for a compact tractor is a heavy-duty commercial mower designed for a fine cut on larger areas. It’s a great implement for those wishing to keep their land nice and neat without spending too much time and effort on lawn mowing.

A mid-mount finish mower does essentially the same job as a mounted or pull-type finish mower, except that it mounts underneath the tractor instead of behind it. Mid-mount mowers tend to better for novice operators who may not like adjusting to the tail swing of a rear-mounted finish mower. Mid-mount mowers give a sub-compact tractor the capabilities of a riding lawnmower---but with built-in tractor strength and durability that surpasses almost any riding mower you could find. And, of course, the compact tractor/mower combination is a much more versatile machine that readily powers a loader, 3‑point attachments, PTO-powered machines, and more to accomplishes various landscaping, tillage and vegetation management tasks.

Yanmar offers customers a variety of finish mowers to cut down help you quickly cross of any mowing jobs that may be on the “honey-do” list. The Yanmar 3-point-mounted finish mower options start at 54 inches and increase to 84 inches in mowing width. Some tractor owners find that a 3-point mounted finish mower is easier and faster to take on and off the tractor than a mid-mount mower.

If your finish mowing job requires more width, ask about our pull-type, flex-wing finish mower options available in a 12.5-foot estate-duty model, and 12-foot, 15-foot, and 17-foot commercial-duty models. How much lawn mower productivity is there in a 17-foot lawn mower? If you average 5.5 miles per hour, that lets you mow more than 10 acres of grass every hour!

https://www.landscapecalculator.com/calculators/mow

Now, when your vegetation management, landscaping or “mowing” job requires heavy-duty clearing and cutting, a rotary cutter is the preferred implement. A rotary cutter does not, however, produce as fine of a cut quality as a finish mower. Therefore, it should be used where the finish quality and appearance are not as important.

Basically, a rotary cutter is what people clip their “back forty” with when they want to keep the land in a pasture/meadow/prairie state and not have it have to turn into brush land or forest. Patches of thistles trying to take over your beef cow pasture and you want to avoid herbicide use? Hit those stickery pasture polluters with a rotary cutter. Very satisfying. Your lawn mowing equipment will thank you and live to mow another day.

Yanmar offers rotary cutters in several cutting widths and machine weights to match the jobs at hand and the available tractor power. Our single-spindle, 3-point -mounted cutters range from 42 inches to 84 inches in cutting width.

Wait, you’re saying that’s not wide enough? No problem! Yanmar pull-type flex-wing rotary cutters are here to the rescue. They let you do what you need to do to a lot more fescue. Yanmar flex-wing rotary cutters come in 12-foot and 15-foot widths. Those are big rotary cutter widths but these machines are designed to be both strong and efficient-and-trim to match the capabilities of 47 and 59 horsepower Yanmar YT3 Series compact tractors.

As you can see, across a wide range of lawn care and vegetation management demands, there is a cutting and mowing implement designed to help you get more done every hour and every day. Look at the lawns and land you need to maintain. Measure the true square footage or acreage you need to cover. The sum total might surprise you. Decide what needs finish mowing and what needs a rougher form of vegetation management. Factor in the tractor power you have or need to add to the mix. Then you will see which mowing or rotary cutter (or both) solutions you need to care properly for the land you are responsible for.

Read more →

This Week's YANMAR Product Pro-tip: USING THE THROTTLE BOOST

Leanne Schmid

LADIES AND GENTLEMEN, REV YOUR ENGINES!

LET'S SAY YOU ARE DOING LOADER WORK WITH YOUR YT347 OR 359.....
Keeping the engine RPMS at the desired level keeps the lift & lower functions, bucket dump, and return actions on your front loader prompt and responsive to make the job go quickly and comfortably.

Throttle Boost can also help when you need to maintain the power to the wheels.  For example; you need to drive the loader bucket into the material you are trying to scoop, without stalling the engine.

Yanmar YT3 Series tractor come with a standard THROTTLE BOOST feature. The Throttle Boost control button is conveniently located on the loader joystick so you don’t have to move your hand from the joystick control to increase the engine RPMS when needed.

Often, when you are doing loader work you are in a limited space such as a hay shed, horse or cattle barn, or doing construction/landscaping work close to buildings and other obstacles. You definitely don’t want to increase your travel speed by boosting your engine RPM in these areas; you don’t want to have to rebuild that barn or gazebo!

KEEP THIS IN MIND:
When operating a Yanmar YT3 series tractor, avoid performing loader work with the range shift lever in the 3rd speed range position. When the range shift lever is at 3, Throttle Boost is turned off. Throttle Boost is only active when the range shift lever is in the 1st and 2nd speed range positions.
Also, remember that the Throttle Boost engine RPMs will not exceed the maximum RPM setting for the A/B mode settings you are simultaneously using.

Read more →

7 tips to help you get your lawn ready for mowing season.

Leanne Schmid

Some spring lawn care preparation can be done in the fall if you want to get a jump on it. But, preparing your lawn in spring is essential for a healthy lawn all summer. ReadRead on for more...

Read more →

SNOW THROWER MAINTENANCE SCHEDULE AND TIPS

Leanne Schmid

MAINTENANCE SCHEDULE AND TIPS


TAKE CARE OF YOUR MACHINE THROUGHOUT THE WINTER WITH CUB CADET'S SNOW THROWER MAINTENANCE SCHEDULE.

Just like your riding lawn mower, your snow thrower requires maintenance throughout the season.
Whether you have a 1X single-stage snow thrower, a 2X two-stage snow thrower or a new, one-of-a-kind 3X three-stage snow thrower, the following maintenance schedule and tips will help you keep it running smoothly through blustery winter storms.
You don't want to be snowed in with a faulty snow thrower because you neglected maintenance, so be sure to follow through on these regular items and bring your snow thrower in for service if you discover a more significant issue during snow thrower maintenance.


After 1st 5 Hours of Use
 
After each use (or every 5 hours)
 
After every season or 25 hours
 
After every season or 50 hours
 
After every season or 100 hours
 
Change the engine oil
 
X


X


Check the engine oil


X


Clean the exhaust area


X


Check the spark plug


X


Lubricate the gear shaft


X


Service the spark plug


X
 

FOLLOW THESE SNOW THROWER MAINTENANCE TIPS FOR PROPER USE OF YOUR MACHINE.

Use these snow thrower tips to carry out maintenance throughout the year. For questions or details on more complicated repairs, check out the other how-to tutorials from Cub Cadet here.

  • Disengage all control levers and stop the engine before cleaning, repairing or inspecting the snow thrower. Wait until the auger/impeller comes to a complete stop. Disconnect the spark plug wire and ground it against the engine to prevent unintended starting.
  • Check bolts and screws for proper tightness at frequent intervals to keep the machine in safe, working condition. The natural vibration of the machine can cause them to loosen throughout the winter. Also, visually inspect the machine for any damage.
  • Do not change the engine's governor setting or over-speed the engine. The governor controls the maximum safe operating speed of the engine.
  • Check all components frequently and replace with the original equipment manufacturer's (OEM) parts only. Snow thrower shave plates and skid shoes are subject to wear and damage and proper inspection and repair can keep you safe while operating the machine. Use of parts which do not meet the OEM's specifications may lead to improper performance and compromise safety.
  • Verify control levers periodically to ensure they engage and disengage properly and adjust if necessary.
  • Maintain or replace safety and instruction labels, as necessary to ensure anyone operating the machine follows proper procedure.
  • Observe proper disposal laws and regulations for gas, oil, etc. to protect the environment.
  • Check the fuel line, tank, cap and fittings frequently for cracks or leaks. Replace if necessary.
  • Do not crank the engine with the spark plug removed.

Read more →