7 tips to help you get your lawn ready for mowing season.

Leanne Schmid

Some spring lawn care preparation can be done in the fall if you want to get a jump on it. But, preparing your lawn in spring is essential for a healthy lawn all summer. ReadRead on for more...

Read more →

SNOW THROWER MAINTENANCE SCHEDULE AND TIPS

Leanne Schmid

MAINTENANCE SCHEDULE AND TIPS


TAKE CARE OF YOUR MACHINE THROUGHOUT THE WINTER WITH CUB CADET'S SNOW THROWER MAINTENANCE SCHEDULE.

Just like your riding lawn mower, your snow thrower requires maintenance throughout the season.
Whether you have a 1X single-stage snow thrower, a 2X two-stage snow thrower or a new, one-of-a-kind 3X three-stage snow thrower, the following maintenance schedule and tips will help you keep it running smoothly through blustery winter storms.
You don't want to be snowed in with a faulty snow thrower because you neglected maintenance, so be sure to follow through on these regular items and bring your snow thrower in for service if you discover a more significant issue during snow thrower maintenance.


After 1st 5 Hours of Use
 
After each use (or every 5 hours)
 
After every season or 25 hours
 
After every season or 50 hours
 
After every season or 100 hours
 
Change the engine oil
 
X


X


Check the engine oil


X


Clean the exhaust area


X


Check the spark plug


X


Lubricate the gear shaft


X


Service the spark plug


X
 

FOLLOW THESE SNOW THROWER MAINTENANCE TIPS FOR PROPER USE OF YOUR MACHINE.

Use these snow thrower tips to carry out maintenance throughout the year. For questions or details on more complicated repairs, check out the other how-to tutorials from Cub Cadet here.

  • Disengage all control levers and stop the engine before cleaning, repairing or inspecting the snow thrower. Wait until the auger/impeller comes to a complete stop. Disconnect the spark plug wire and ground it against the engine to prevent unintended starting.
  • Check bolts and screws for proper tightness at frequent intervals to keep the machine in safe, working condition. The natural vibration of the machine can cause them to loosen throughout the winter. Also, visually inspect the machine for any damage.
  • Do not change the engine's governor setting or over-speed the engine. The governor controls the maximum safe operating speed of the engine.
  • Check all components frequently and replace with the original equipment manufacturer's (OEM) parts only. Snow thrower shave plates and skid shoes are subject to wear and damage and proper inspection and repair can keep you safe while operating the machine. Use of parts which do not meet the OEM's specifications may lead to improper performance and compromise safety.
  • Verify control levers periodically to ensure they engage and disengage properly and adjust if necessary.
  • Maintain or replace safety and instruction labels, as necessary to ensure anyone operating the machine follows proper procedure.
  • Observe proper disposal laws and regulations for gas, oil, etc. to protect the environment.
  • Check the fuel line, tank, cap and fittings frequently for cracks or leaks. Replace if necessary.
  • Do not crank the engine with the spark plug removed.

Read more →

HOW TO PREPARE YOUR SNOW THROWER FOR WINTER USE

Leanne Schmid

HOW TO PREPARE YOUR SNOW THROWER FOR WINTER USE


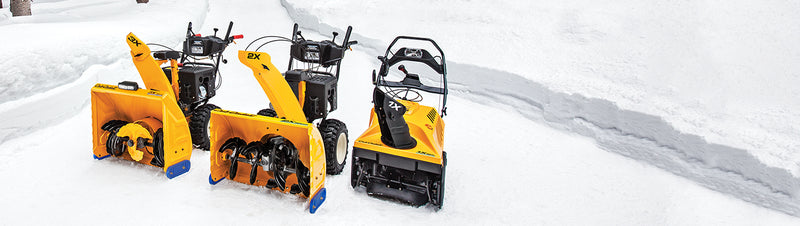
Whether you're prepping your trusty 2X two-stage snow thrower for yet another winter, or getting your new 3X three-stage snow thrower ready to face its first blizzard, these snow thrower maintenance tips can help ensure you're prepared for cold and stormy weather this winter.

Make sure all your parts are moving smoothly, but also make sure you tighten up the nuts and bolts that may have been shaken loose by use last season.

STEP 1 - CHANGE THE OIL ON YOUR SNOW THROWER.

This should also be done after the first five hours of use this winter and after every subsequent season.

STEP 2 - INSTALL A NEW SPARK PLUG IF NECESSARY.

Check your spark plug at the start of every season. It it has become dirty, it may just need cleaning. However, rust and corrosion on your snow thrower's spark plug will call for replacement.

STEP 3 - INSPECT BELTS FOR WEAR. REPLACE THEM IF NECESSARY.

It's wise to keep a few snow thrower belts on hand in your garage or shed so you can make replacements quickly when necessary. You can check out the top-selling belts from Cub Cadet to find what you need for your model. Any significant wear and tear merits replacement to avoid the danger and frustration of a belt breaking during use.

STEP 4 - DRAIN THE GAS TANK AND REPLACE WITH FRESH FUEL.

Make sure your fuel includes stabilizer so it stays fresh even if you have a few mild weeks during the winter and don't need to run your snow thrower.

STEP 5 - LUBRICATE THE DRIVE AND CHASSIS.

Make sure all your parts are moving smoothly, but also make sure you tighten up the nuts and bolts that may have been shaken loose by use last season. 

After you've prepared your snow thrower for winter, start it up and let it run for a few minutes in a well-ventilated area just to be certain there are no surprises when it storms. Consider starting it every so often if it sits for an extended period of time

Read more →