7 tips to help you get your lawn ready for mowing season.

Leanne Schmid

Some spring lawn care preparation can be done in the fall if you want to get a jump on it. But, preparing your lawn in spring is essential for a healthy lawn all summer. ReadRead on for more...

Read more →

General Snow Blower Usage

Leanne Schmid
QUESTION:
What are some general snow throwing procedures?
ANSWER:

Pre-season (a few weeks before first snow):

  1. Review the Operator's Manual each season.  
  2. Check maintenance and adjustment items: Make sure your snow thrower is ready when you need it.
    • Single-stage snow throwers: drive belt, shave plate, auger spirals, engine oil (4-cycle only), spark plug. 
    • Multiple-stage snow throwers: slide shoes, shave plate, auger shear pins, belts, drive disc (if equipped), engine oil, spark plug.
  3. Add fresh fuel and test-run the snow thrower in an open area with plenty of room to maneuver.

First Snow:

  1. Confirm that there are no hazardous objects to be hidden by the snow in the area to be cleared.  It is better not to find that dog chain or frozen newspaper with the snow thrower.
  2. DO NOT's:
  • Do not try to clear solid ice with the snow thrower. It can damage the snow thrower.
  • Do not throw snow in the direction of anything you would not throw a rock at.
  • Do not try to clear a clogged snow thrower by hand. Turn-off the snow thrower and use snow clearing tool, broom stick, or similar tool.
  1. If the snow thrower has a throttle control, set the engine to run at maximum speed when throwing snow. It runs most efficiently there.
  2. If the snow is especially deep or heavy, slow down your clearing pace to avoid bogging down the engine.
  3. When possible, start clearing snow by creating a path down the middle of the area to be cleared. Work outward from this first path in a spiral pattern, throwing snow to the nearest edge of the area you are clearing. This will pile cleared snow on both sides of the cleared area.
  4. If snow can only be thrown in one direction, start at the side that you cannot throw snow toward. Widen the path with each pass, toward the side you can throw snow to.
  5.  When using a multiple-stage snow thrower on a gravel surface, adjust the slide shoes to raise the front of the snow thrower. For smoothly paved surfaces adjust the slide shoes to keep the shave plate ¼” above the pavement. Refer to the Operator's Manual.

After Use:

  1. Turn off the engine.
  2. Clean snow off of the snow thrower using a broom.
  3. Check shear pins. The augers overlap and a shear pin could break without the operator noticing. If one shear pin breaks, the auger will still be driving the auger next to it, but the shear pin that drives the second auger will carry twice the load.

FOR MORE INFORMATION, PLEASE CONTACT US OR YOU CAN VISIT THE CUB CADET SUPPORT WEBSITE HERE

Read more →

What should be checked if a riding mower cuts unevenly?

Leanne Schmid

Deck Leveling - Riding Mower

What should be checked if a riding mower cuts unevenly?

We recommend that the tire pressures be checked before doing any other adjustments, as this may be the problem and any further adjustments would also require the tires be properly inflated beforehand.

Tire pressures are stated in Pounds per Square Inch (PSI) measure. The factory settings for residential riding mower tires are generally 10 PSI for rear tires and 14 PSI for front tires. But it's a good idea to always check the side wall of the tire itself, as the tires on a particular model may not always be standard equipment tires. The maximum tire pressure is embossed on each tire. This is the maximum tire pressure. Inflating tires to 2-3 PSI under the maximum is also acceptable. as long as the pressure in both front tires are the same and both rear tires are the same.

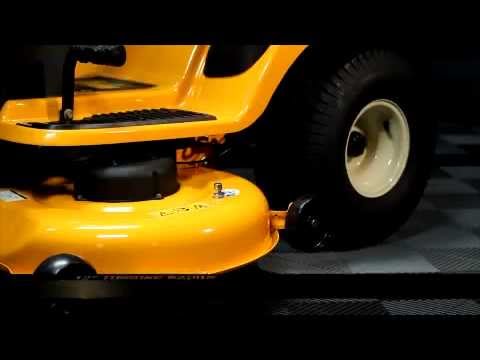
If this doesn't solve the problem, a deck leveling adjustment may be needed. The deck leveling adjustment varies by model and is explained in the Adjustments section of the Operator's Manual. Please refer to the Operator's Manual and follow these instructions as they relate to the particular tractor being serviced.

If the above actions do not correct the problem, it may also be one of two other situations:

  1. The blades and/or spindles could be worn or out of balance. 
  2. There may be bent or damaged deck hangers that would require replacement.

If further assistance is needed, please visit a local authorized service center and have them visually inspect and service the mower. 

Read more →

SNOW THROWER FAQ's

Leanne Schmid

Here we answer some common questions regarding Cub Cadet snow throwers...

1. 

PROBLEM
What is the proper fuel and oil mixture for a 2-cycle engine on a single-stage snow thrower?
SOLUTION

Our two-cycle snow throwers use a 50:1 ratio of gasoline to 2-cycle oil.
A 50:1 ratio is a mix consisting of 2.5 ounces of 2-cycle oil with 1 gallon of gasoline.

NOTE:  Always mix 2-cycle fuel oil and fuel in an approved gasoline safe container prior to filling the engine. Make sure to use a separate gas can for this 2-cycle fuel mixture and label it accordingly. Keep in mind that the fuel capacity of these engines normally is less than a gallon, therefore you will have to use this mixture for multiple fuel fills. Adding a fuel stabilizer will help to increase the shelf life of fuel.

2.

PROBLEM
How is the single-stage snow thrower shave plate adjusted?
SOLUTION

The shave plate adjustment on our single stage snow throwers can be made by first checking the shave plate to find how much adjustment is needed.  To do this, place snow thrower on a level surface.

Drawing auger, shave plate and wheels
Drawing that shows, the auger, shave plate and wheels.

Components on Unit
Components on an actual unit.

These components should all be touching the ground at the same time. If either the auger or wheels are not touching the ground, this means that the shave plate is adjusted too low and needs to be raised.  If the wheels and auger are both touching the ground and the shave plate is not, this means that the shave plate is too high, and needs to be lowered to meet the auger and wheel levels. The shave plate has four nuts and bolts that fasten it on. To make this adjustment, loosen these four fasteners and slide the shave plate up or down as needed.

3.

PROBLEM

How are the skid shoes on a multiple-stage snow thrower adjusted?

SOLUTION

Adjusting the "skid shoes" (a.k.a. "slide shoes" ) on a multiple-stage snow thrower allows you to select how close to the ground the unit will clear snow.

Smooth Surface Adjustment:
Note:  Something will be needed to support the auger housing during this adjustment (thin wood plank, cardboard, etc..) that is approximately 1/8" H x 20" W x 6"D. Make sure the width is slightly less than that of your snow thrower auger width. To properly support your unit for this adjustment, do not use anything that is unstable or unable to support the snow thrower.

  1. Place the supporting device below the center of the shave plate. This support should then elevate the sides of the auger housing slightly.
  2. Next loosen the hardware securing the skid shoes on both sides of the auger housing, slide both shoes until they are positioned even with the ground, then tighten the tighten the hardware and remove the support material.
  3. The shave plate should now be positioned just slightly above the ground with the shoes properly supporting the entire auger housing.

Irregular and Gravel Surface Adjustment:  
If you are clearing a surface that has an unusually irregular surface you should follow the instructions above, with the exception that you should use something thicker than 1/8 of an inch for support during the adjustment. The actual height needed will depend on the severity of the surface irregularities. 

4.

PROBLEM

How can the ground traction on a snow thrower be improved?

SOLUTION

To improve the traction on a snow thrower we have optional tire chains available for most tires. The tire size and/or the name ‘Snow Hog’ or 'X-Trac' should be molded into the side of the tire. Use the following chart to identify which chains fit the tires.

TIRE SIZE

SNOW HOG or X-TRAC

PART # FOR CHAIN SET

13 X 4.1

Yes

OEM-390-062

15 X 6

No

OEM-390-145

16 X 6.5

No

OEM-390-146

16 X 6.5

Yes

OEM-390-655

16 X 4.8

Yes

OEM-390-991

NOTE: All tire size measurements are in inches. NOTE: All chain sets above consist of 2 chains.

Tire chains installed on a snow thrower.

Read more →